

Setting up the Bluetooth Link
Posted by Mike on 17th Dec 2018
In this article we will cover the basics of setting up the Bluetooth cable replacement link for the xPRO V4, xPRO V3, and the Arduino Uno.
xPRO V4:
STEP 1: Gather the supplies:
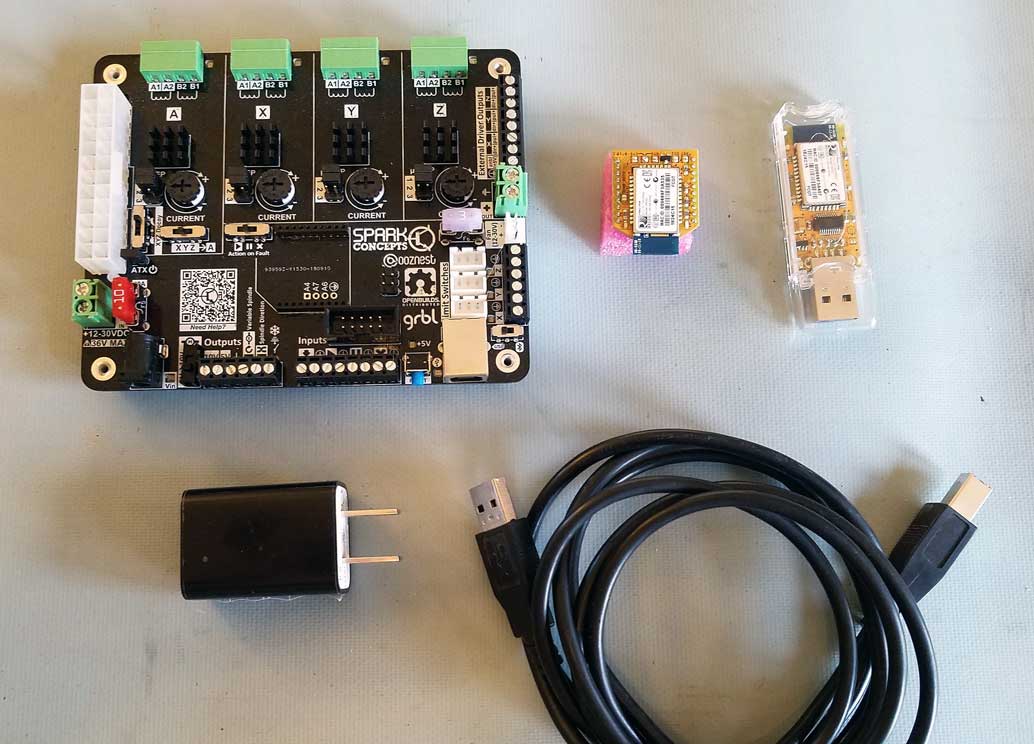
Things you need:
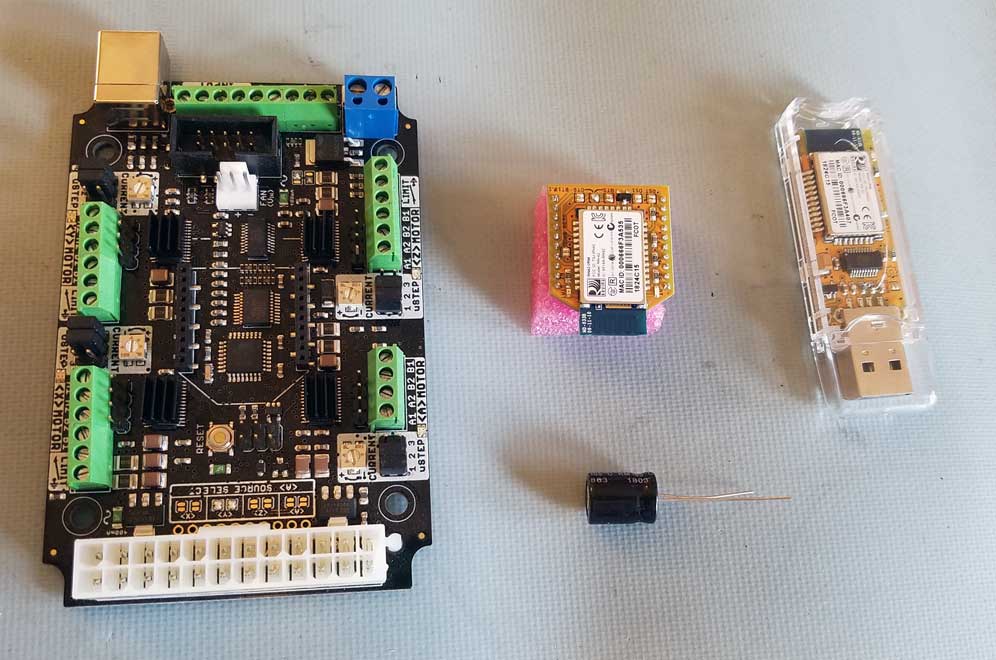
1 x CNC xPRO V4
1 x Bluetooth cable replacement link
* 1 x USB wall charge
* 1 x USB cable
*Optional but highly recommended
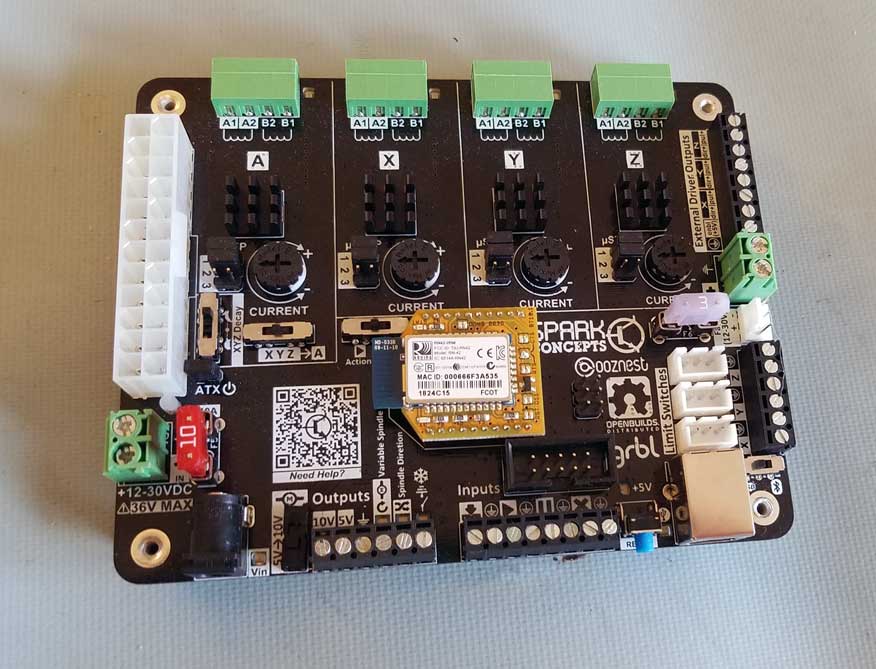
STEP 2: Install Bluebee module into xPRO port. Align the Bluebee module with the white silkscreen outline as above. Ensure that the pins are fully aligned with sockets. Press Bluebee into socket
STEP 3: Install digital power source. Plug USB cable into xPRO V4 and USB wall charger. Do no power xPRO yet.
STEP 3 (optional): If not using USB wall charger for power – flip switch on board from USB to Bluetooth

*Note this will bridge analog and digital power/ground planes and increase the chance of noise related faults.
Step 4: Plug in USB Bluetooth dongle into computer. Wait 1 minute the first use. Power on xPRO V4.
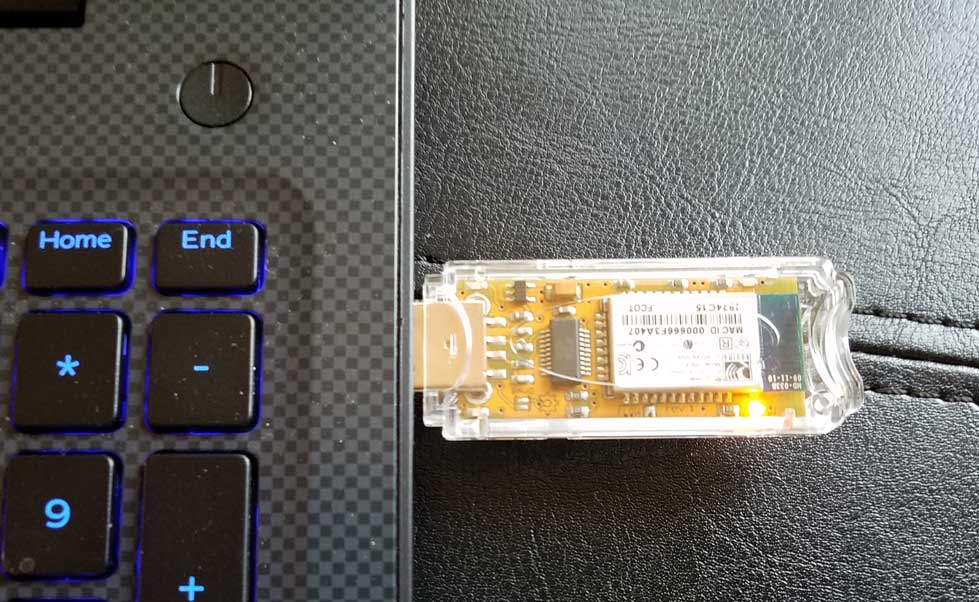
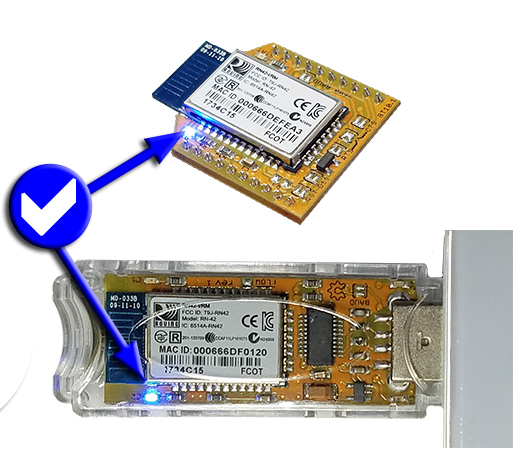
Step 5: Confirm Bluetooth link has been established – both USB dongle and Bluebee will have a solid blue LED showing.
You are now ready to use your Bluetooth cable replacement link! For interfacing, we recommend using Universal Gcode Sender Platform or CNCjs desktop app. *Note, in CNCjs desktop app you will need to hit the reset button after you connect to the link within the software
xPRO V3
STEP 1: Gather the supplies:
Things you need:
1 x CNC xPRO V3
1 x Bluetooth cable replacement link
1 x 100uF 50V capacitor (included with link)
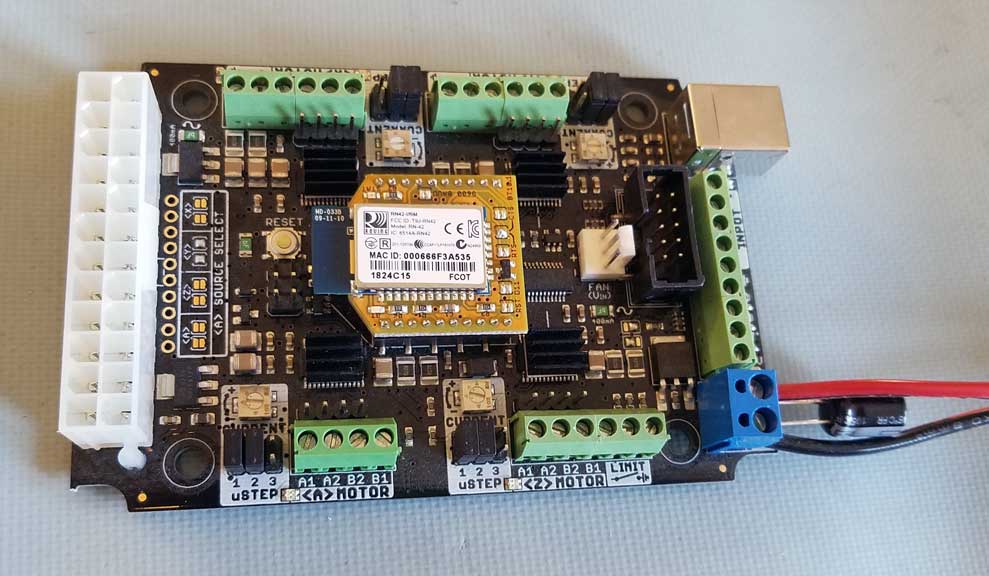
STEP 2: Install Bluebee module into xPRO port. Align the Bluebee module with the white silkscreen outline as above. Ensure that the pins are fully aligned with sockets. Press Bluebee into socket
STEP 3: Install filter capacitor at 24V input terminal – do not power xPRO yet
Step 4: Plug in USB Bluetooth dongle into computer. Wait 1 minute the first use. Turn on xPRO V3.
Step 5: Confirm Bluetooth link has been established – both USB dongle and Bluebee will have a solid blue LED showing.
You are now ready to use your Bluetooth cable replacement link! For interfacing, we recommend using Universal Gcode Sender Platform or CNCjs desktop app. *Note, in CNCjs desktop app you will need to hit the reset button after you connect to the link within the software
Arduino Uno:
STEP 1: Gather the supplies:
Things you need:
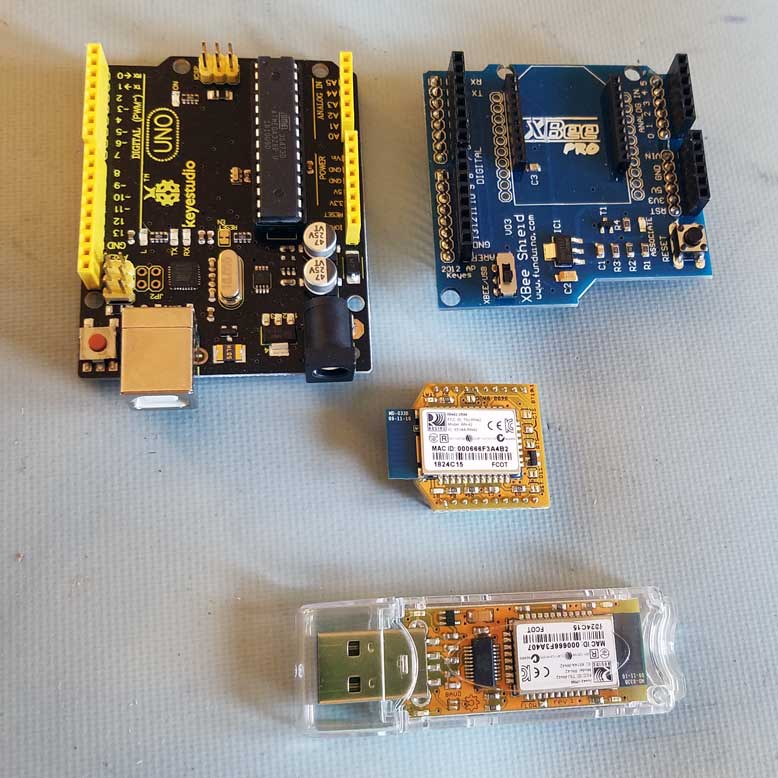
1 x Arduino Uno
1 x Arduino xbee shield
1 x Bluetooth cable replacement link
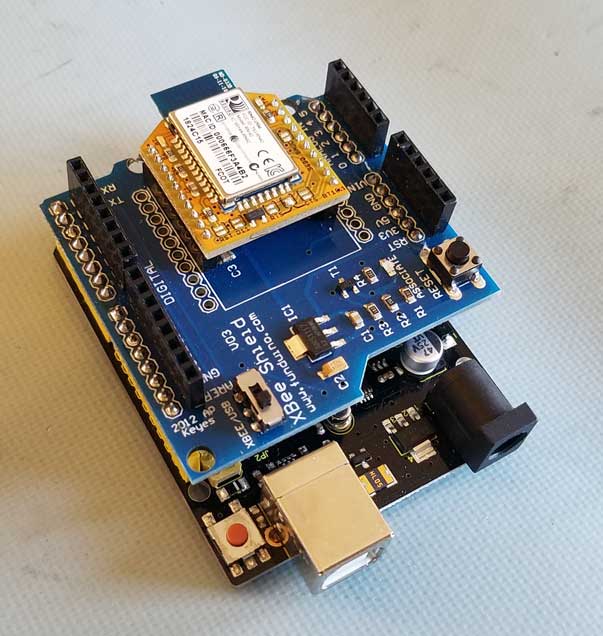
Step 2: Install xbee shield on Arduino Uno
Step 3: Install Bluebee module into xbee port of the xbee shield. Align the Bluebee module with the white silkscreen outline as above. Ensure that the pins are fully aligned with sockets. Press Bluebee into socket
Step 4: Plug in USB Bluetooth dongle into computer. Wait 1 minute the first use. Power on Uno and set xbee/usb switch to "xbee".
Step 5: Confirm Bluetooth link has been established – both USB dongle and Bluebee will have a solid blue LED showing.
You are now ready to use your Bluetooth cable replacement link!